Getting Started
The application should start with an empty Display Window as shown below.
At the top of the Display Window is a Toolbar that provides a quick access to a number of features offered by the application.
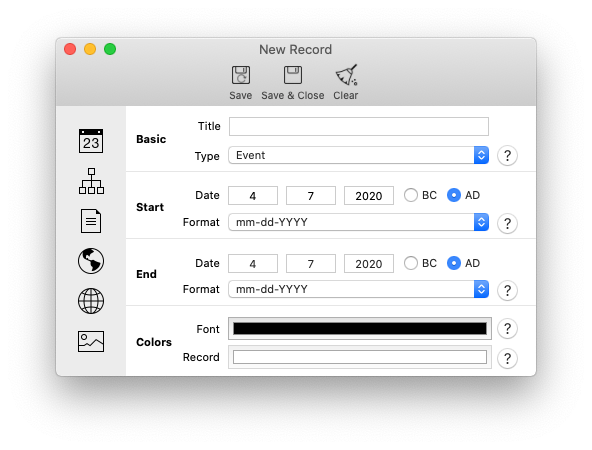
To add a record, click on the ‘Add’ icon on the Toolbar. The Record Management Window, shown below, will appear. You will enter, and later edit, all the Record components in this window.
Istoriam’s record can be configured with a large number of components. We will review a few of those in this ‘Getting Started’ section. A full description of the components is provided in the section ‘Introduction to Record Components’. It is important to note though that all the components are optional. The application will set a default value for you when one is not entered.
The Record Management Window is divided into three sections: A ‘Toolbar’ section with three icons to ‘Save’, 'Save & Close', and ‘Clear’ the form; a ‘Control Menu’ on the left side to select which group of components to work on; and a right side where you can define the value of the corresponding component.
The Record Management Window starts with the ‘Main’ components selected. Start by entering a title for your record such as ‘My First Record’. Change the ‘End Date’ to be a few days after the start date. Click on the Text color panel and select a color for your record. Now click on Description option (3rd icon) from the left control menu. A single empty field will show up in the right section where you can enter a description associated with your record. Let your imagination go and type some description.
Finally, let’s add a photo to the record. Select the Photo option from the left control menu (last icon). Click on the “+” button to add a photo. Browse your directory for a photo, select it and click on ‘Submit’.
That’s it for now. Click on the ‘Save' icon. Your new record is now added to the database and should be visible in your Display Window. An example of this record is shown below.
To edit a record and change its content, double click on it. The Record Management Window will open with its fields pre-populated with the Record components values.
To delete a record, single click on it and then click on the ‘Delete’ icon from the Toolbar.
If you have added a description text and a photo as instructed in this section, your record will show up in the Display Window with two icons next to the dates. If you right click on the first icon, a popover window will appear with the description text. If you right click on the second icon, a popover window will show up with the selected picture.
You can try to add other component to the record and see what they can do.
Istoriam has a rich set of features. This User Manual provides instructions and videos on how to use them.